


・Smart Custom Fieldsのオプションページ作成方法は?
こんな疑問にお答えします。
Smart Custom Fieldsはオプションページが作成可能です。
オプションページとは、カスタムフィールド用の特定ページみたいな感じ。
これがあれば同じフィールドの内容を、多数のページで表示できます。かなり便利。
しかも簡単に実装できちゃいます。

すぐにできるよ!
ということで、この記事では「Smart Custom Fieldsのオプションページ作成方法」について解説していきます!
・Smart Custom Fieldsのオプションページ作成
・Smart Custom Fieldsのオプションページ出力
・Smart Custom Fieldsのオプションページ実装例
Smart Custom Fieldsの基本的な使い方は下記をどうぞ↓
 【解説】Smart Custom Fieldsの使い方【追加|設定|表示方法】
 目次
【解説】Smart Custom Fieldsのオプションページ【作成方法】
まずはオプションページの作成方法から見ていきましょう。
手順は下記ですね↓
- functions.phpに設定コードを記述
- 表示条件(オプションページ)で選択
- オプションページにてフィールドの値を記述
まずfunctions.phpにて下記のようにコードを記述します。
/**
* @param string $page_title ページのtitle属性値
* @param string $menu_title 管理画面のメニューに表示するタイトル
* @param string $capability メニューを操作できる権限(maange_options とか)
* @param string $menu_slug オプションページのスラッグ。ユニークな値にすること。
* @param string|null $icon_url メニューに表示するアイコンの URL
* @param int $position メニューの位置
*/
SCF::add_options_page(
'実績サイト',
'実績情報',
'manage_options',
'work-option',
'dashicons-admin-generic',
11
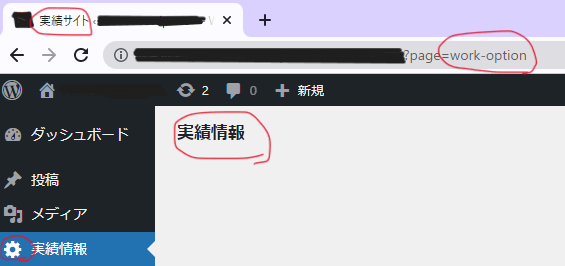
);すると管理画面にてオプションページが表示され、下記のように反映されます↓
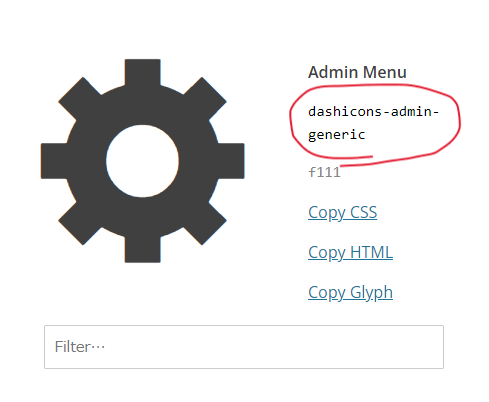
アイコンのURLは下記リンクにて探しましょう!
今回は例として「dashicons-admin-generic」という下記部分をコピペして使用しました!
現時点でオプションページは完成しました。
では次にカスタムフィールドの値を入れる項目を、作ったオプションページに反映させましょう。
やり方は簡単で、表示条件(オプションページ)にて選択するだけ。
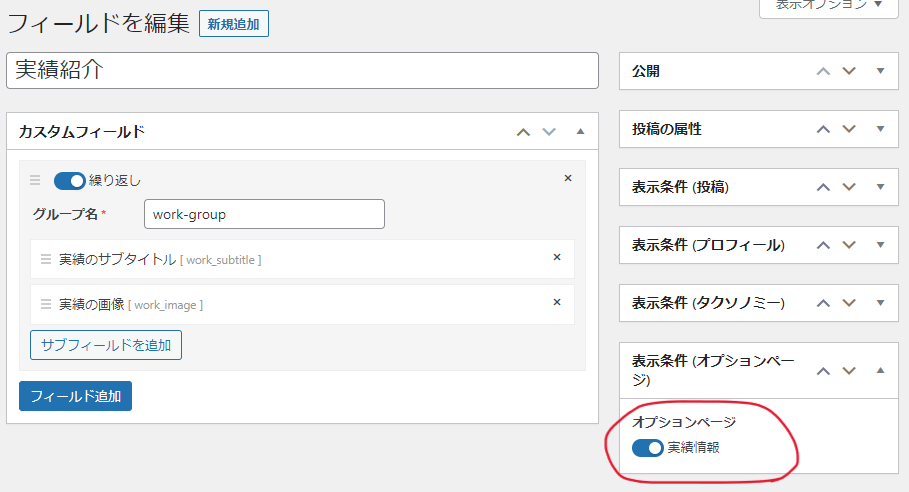
あとは通常通り、オプションページにてフィールドの値を記述すればOK。
こんな感じでフィールドの項目しか現れないページなのが特徴ですよ。
【解説】Smart Custom Fieldsのオプションページ【出力方法】
あとはオプションページのフィールドの値を出力するだけですね。
- フィールドの値を出力
- グループの値を出力
- オプションページ全データを出力
順に見ていきましょう!
SCF::get_option_meta( 'メニュースラッグ', 'フィールド名' );使い方の例としては下記↓
<?php
$custom_field_value = SCF::get_option_meta( 'メニュースラッグ', 'フィールド名' );
if ( $custom_field_value ) {
    echo esc_html( $custom_field_value );
}
?>SCF::get_option_meta( 'メニュースラッグ', 'グループ名' );使い方の例としては下記↓
<?php
$group_fields = SCF::get_option_meta( 'メニュースラッグ', 'グループ名' );
foreach ( $group_fields as $field_name => $field_value ) {
    echo '<p>' . esc_html( $field_value ) . '</p>';
}
?>SCF::get_option_meta( 'メニュースラッグ' );使い方の例としては下記↓
<?php
$all_fields = SCF::get_option_meta( 'メニュースラッグ' );
foreach ( $all_fields as $field_name => $field_value ) {
    echo '<p>' . esc_html( $field_value ) . '</p>';
}
?>
【解説】Smart Custom Fieldsのオプションページ【実際に出力してみた!】
最後に実際に出力してみた例を紹介しますね。
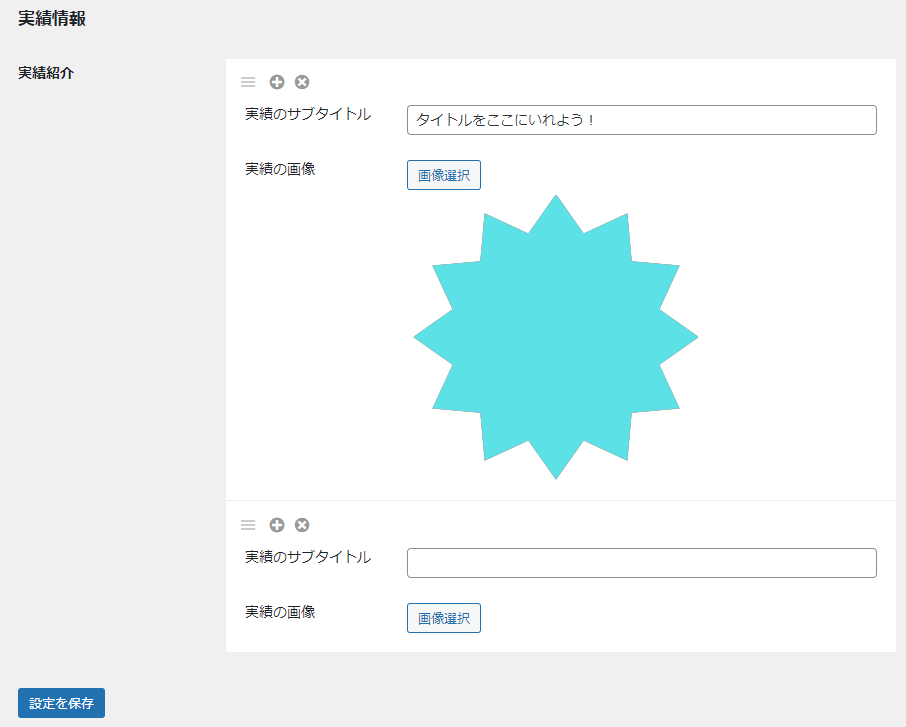
カスタムフィールドの項目がこちら↓
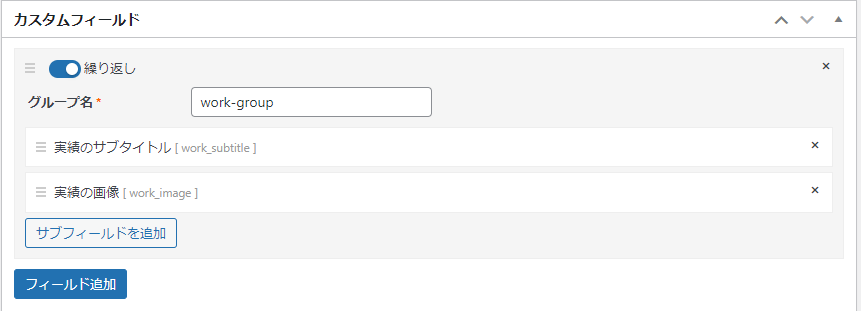
ちなみに繰り返ししております!
スラッグ名をまとめるとこんな感じ↓
- オプションページのメニュースラッグが「work-option」
- カスタムフィールドのグループ名が「work-group」
- テキストのフィールド名が「work_subtitle」
- 画像のフィールド名が「work_image」
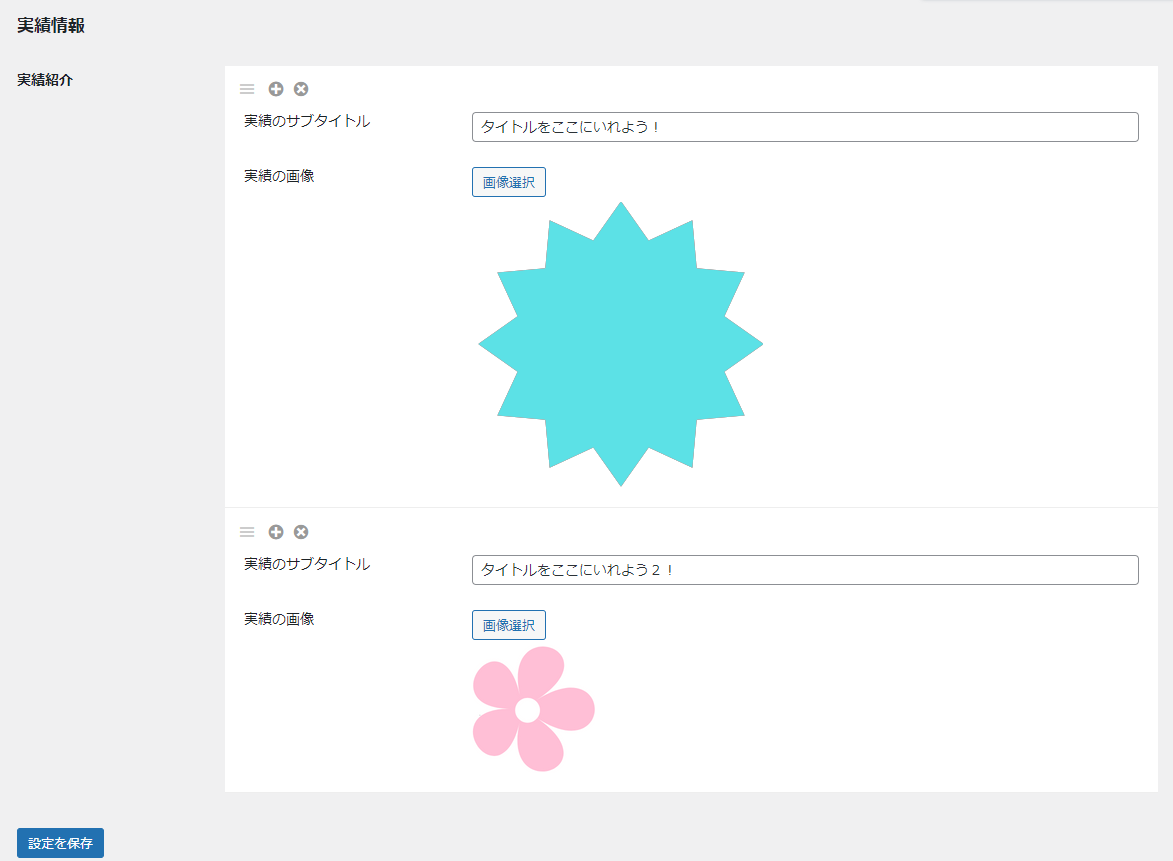
オプションページがこんな感じ↓
で、下記のようにforeachを回して出力コードを記述したら↓
<?php
  $work_subtitles = SCF::get_option_meta('work-option', 'work-group');
  if ($work_subtitles) {
      foreach ($work_subtitles as $work_subtitle) {
          $title = esc_html($work_subtitle['work_subtitle']);
          $image = wp_get_attachment_image($work_subtitle['work_image'], 'full');
          echo '<h2>' . $title . '</h2>';
          echo $image;
      }
  }
?>
上手く表示されました!↓

 【解説】Smart Custom Fieldsの繰り返し出力方法
  【解説】Smart Custom Fieldsのフィールド出力方法【一覧まとめ】
 【解説】Smart Custom Fieldsのオプションページ作成・出力:まとめ
- functions.phpに設定コードを記述
- 表示条件(オプションページ)で選択
- オプションページにてフィールドの値を記述
- あとは値を出力する
オプションページはかなり便利なので参考にしてみてください!
