パソ君
・Swiperのブレイクポイントってどう設定するの?
こんな疑問にお答えします。
「PCの時はスライド3枚表示して、スマホの時は1枚表示にしたい」などの要望はよくありますよね。
Swiperならブレイクポイントを簡単に設定できるので、そのような実装も楽です。

ジト
すぐにできるよ!
ということで、この記事では「Swiperのブレイクポイント設定方法」について解説していきます!
swiper自体の作り方については下記記事を参考に↓
 【簡単】Swiperの使い方|初心者向けに解説【オプション】
 この記事でわかること
Swiperのブレイクポイント設定方法
【解説】Swiperのブレイクポイント設定方法【レスポンシブ対応】
そんなブレイクポイントを設定したサンプルがこちら↓
See the Pen swiper ブレイクポイント by jito-coder (@jito-coder) on CodePen.
左上の「HTML」をクリックしてみてください。
反映の横幅が小さくなると、1枚表示になりますよね。
<div class="swiper">
    <div class="swiper-wrapper">
        <div class="swiper-slide swiper-slide01">
            <img src="https://jito-site.com/wp-content/uploads/2023/01/1.png" alt="">
        </div>
        <div class="swiper-slide swiper-slide02">
            <img src="https://jito-site.com/wp-content/uploads/2023/01/2.png" alt="">
        </div>
        <!-- 省略 -->
    </div>
    <div class="swiper-pagination"></div>
    <div class="swiper-button-prev"></div>
    <div class="swiper-button-next"></div>
</div>
window.onload = function() {
const swiper = new Swiper(".swiper", {
spaceBetween: 20,
loop: true,
pagination: {
el: ".swiper-pagination",
clickable: true,
},
navigation: {
nextEl: ".swiper-button-next",
prevEl: ".swiper-button-prev",
},
slidesPerView: 1,
breakpoints: {
640: {
slidesPerView: 3,
}
}
});
}ブレイクポイントの設定方法としては「breakpoints」のオプションを使うことです。
書き方はこんな感じ↓
window.onload = function() {
    const swiper = new Swiper(".swiper", {
        slidesPerView: 1,
        breakpoints: {
            // 横幅640px以上のとき~
            640: {
                slidesPerView: 3,
            }
        }
    });
}
「640」という数値が、横幅を示します。
「横幅が〇〇px以上のとき~」という指定になるのが特徴です。
そのため順番としてはスマホ⇒PC表示という書き順ですね。
ブレイクポイントを複数設定する場合は、下記のように記述します。
window.onload = function() {
    const swiper = new Swiper(".swiper", {
        spaceBetween: 20,
        loop: true,
        pagination: {
            el: ".swiper-pagination",
            clickable: true,
        },
        navigation: {
            nextEl: ".swiper-button-next",
            prevEl: ".swiper-button-prev",
        },
        slidesPerView: 1,
        breakpoints: {
            // 横幅640px以上のとき~
            640: {
                slidesPerView: 3,
            },
            // 横幅768px以上のとき~
            768: {
                slidesPerView: 4,
            },
            // 横幅1000px以上のとき~
            1000: {
                slidesPerView: 5,
            },
        }
    });
}
ジト
「,」で区切るのを忘れずに!
ちなみにブラウザの横幅が変わるたびに、イベントを発生したい場合は下記のコードで実装できます↓
function initializeSwiper() {
    const swiper = new Swiper(".swiper", {
        spaceBetween: 20,
        loop: true,
        pagination: {
            el: ".swiper-pagination",
            clickable: true,
        },
        navigation: {
            nextEl: ".swiper-button-next",
            prevEl: ".swiper-button-prev",
        },
        slidesPerView: 1,
        breakpoints: {
            640: {
                slidesPerView: 3,
            },
            768: {
                slidesPerView: 4,
            },
            1000: {
                slidesPerView: 5,
            },
        }
    });
}

window.onload = function() {
    initializeSwiper();
    window.onresize = function() {
        initializeSwiper();
    }
}
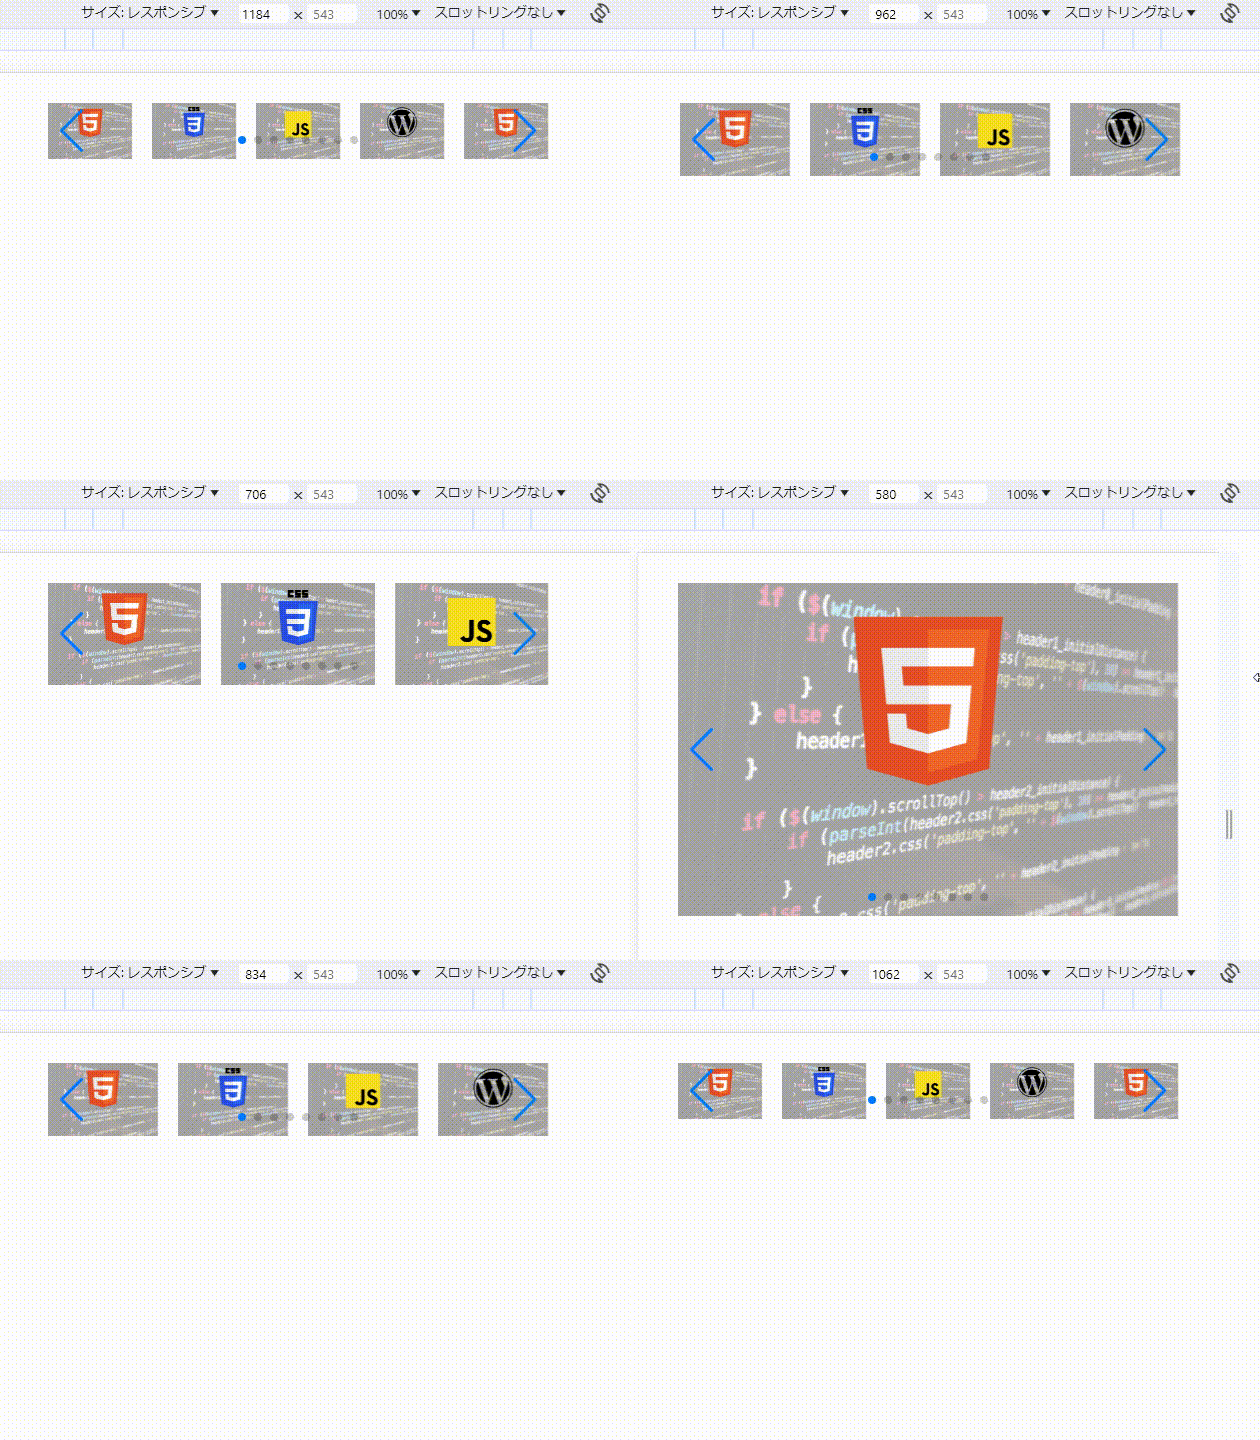
挙動がこちら↓

これでブレイクポイントを設定したSwiperのスライダーが完成しました。
【解説】Swiperのブレイクポイント設定方法【レスポンシブ対応】:まとめ
- 「breakpoints」のオプションを使い設定
- 「横幅が〇〇px以上のとき~」という指定になる
- ブレイクポイントは複数設定可能

ジト
Swiperのブレイクポイントを設定する時はためしてみてね!


